APIs facilitate the interaction between different software applications by allowing them to communicate with each other and share information
In e-commerce, APIs are commonly used to connect different software systems.
Here are the steps to create a Shopify API.
Using an API, you can control who can access certain parts of your system, and you can choose whether they can “read” or “write” information.
“Reading” information means they can view it, while “writing” information means they can update it. This allows you to control what information is shared and who has permission to modify it.
If you need to generate an API for your own Shopify Store, you can also refer to this guide, but you should grant Read and Write Permissions to ALL (under Point 6)!!!
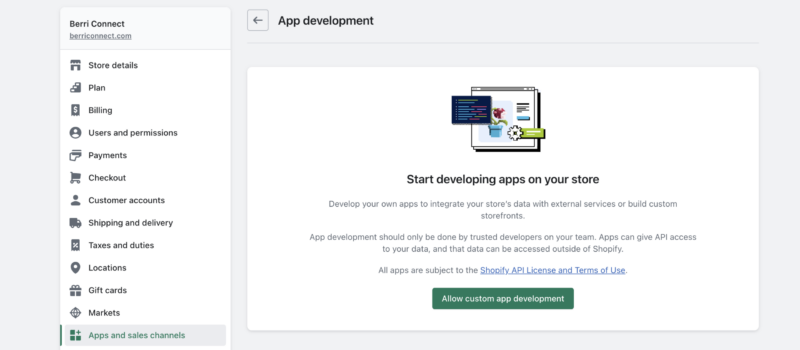
From your Shopify admin, go to Apps.
Click App and Sales Channel Settings
3. Click Develop Apps.
First Time User (step in between)
Click Allow custom app development twice

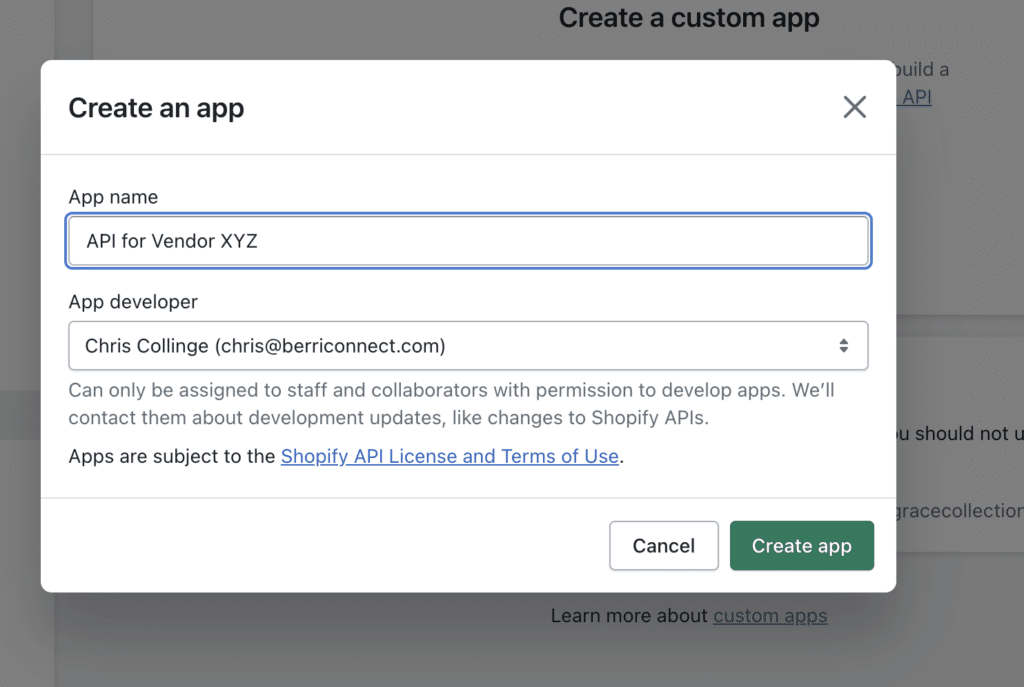
4. Click Create an App.
5. Enter the App name (e.g. API for Vendor XYZ)
and select an App developer.
The app developer can be the store owner or
any staff or collaborator account with the
Develop apps permission.

6. Click Configure Admin API scopes
You will see a list of “read” and “write” permission you need to select
Select the following permissions:
Inventory – read_inventory
Orders – write_orders and read_orders
Products – read_products
Locations – read_locations and write_locations
Returns – write_returns
Depending on your needs you may select more permission like
Shipping – read_shipping
Shop locales – read_locales
Product listing – read_product_listings
View product or collection listings
Publications – read_publications
View groups of products that have been published to an app
Files – read-files
7. Click Save, go back to Overview, and click Install App
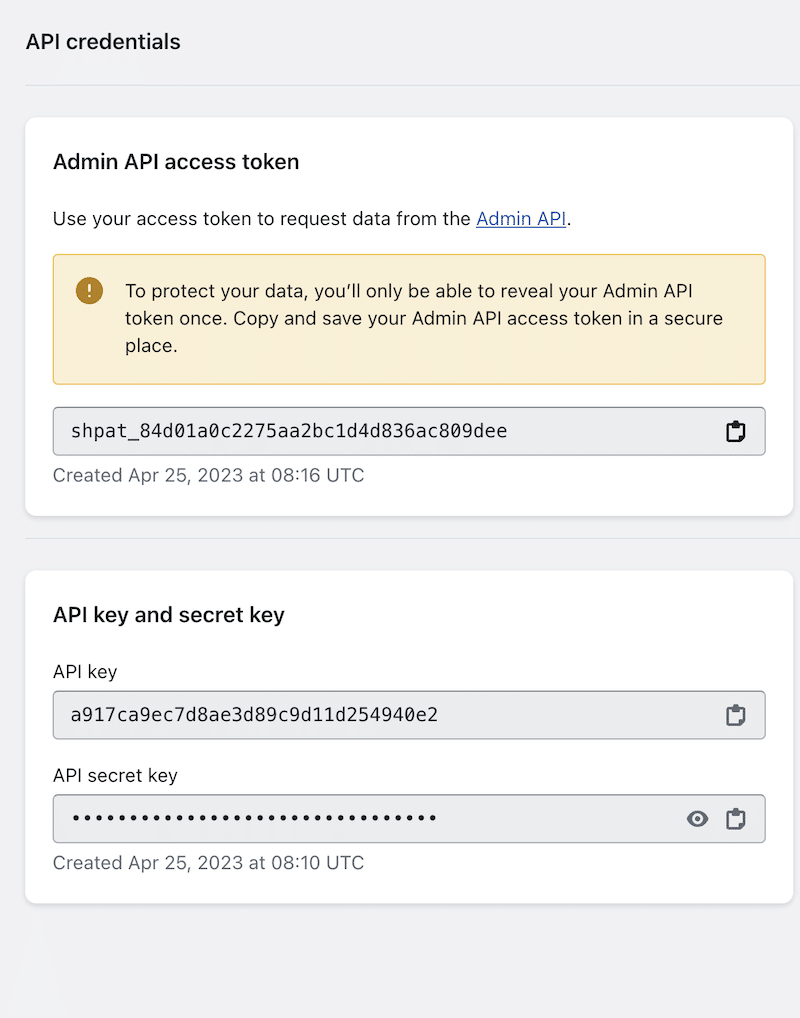
8. Click API Credentials
Under the API Credentials tab copy the Admin API access token.
This key can only be accessed one time so please make sure to copy it before navigating away from the page.
If you do not copy it you will need to click uninstall and then reinstall and copy the new key.
